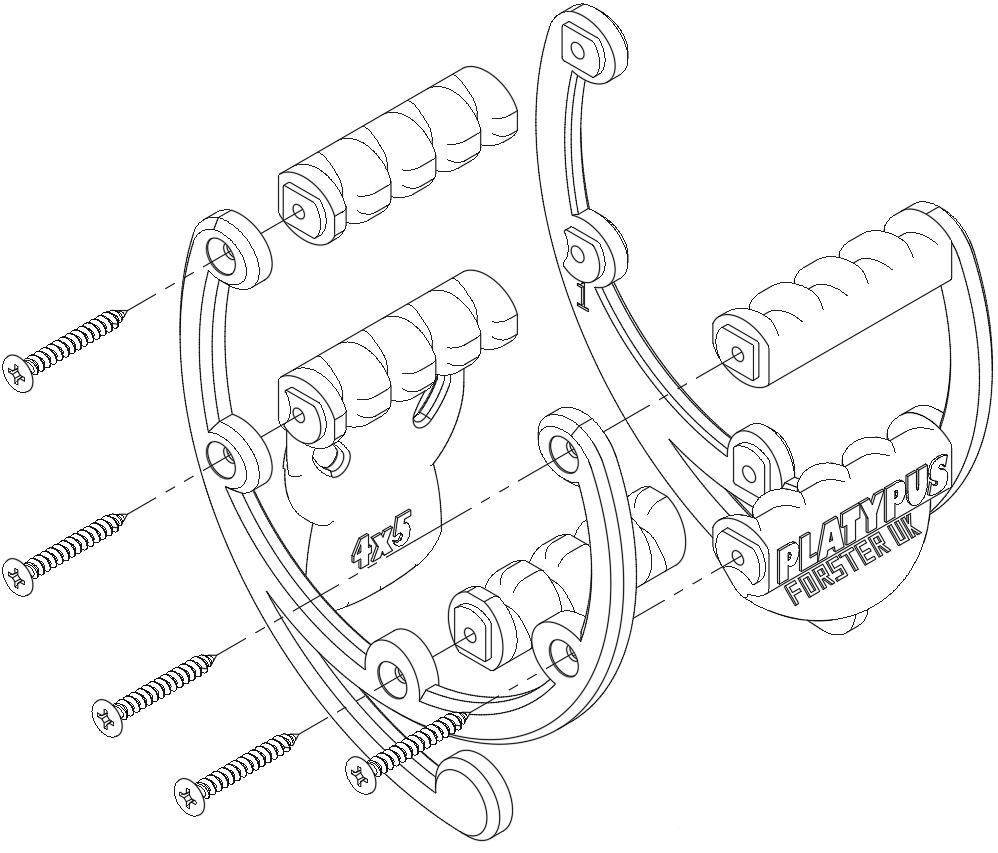
How to Assemble a Platypus Tilting Drying Rack V2 (4x5)

Contents
1x Front Frame
1x Rear Frame
3x Standard Dividers
1x Front Touchdown Divider
1x Rear Touchdown Divider
10x PH2 Screws
Pro Tips for Assembly
The rack consists of two frames and five dividers
The parts are designed so that the dividers can
only be fitted in the correct location
Order of assembly is up to you, but it is recommended to fit and screw the
dividers to the (rear) frame marked “1”, first
Once assembled, if the Platypus is a little
twisted, then carefully twisting the rack in the opposite direction will
straighten it up
When tightening the screws, remember that the screws are stronger than
the plastic frame, so when the screw starts to feel tight, then stop screwing!
